Hey there! This post might be a little off topic, because we are focusing this blog mainly on polymer clay projects but we love this technique so much and we really want to share it with you, so here it is 🙂
This air dry clay tutorial for Christmas ornaments is very simple and easy so it is suitable for everybody, including children and DIY beginners. These ornaments might decorate your Christmas tree but they are also useful as name tags for the gifts, or they can even become the actual gift. This is really great idea if you have a tradition of gifting to your friends and colleagues and you need something small to give to many people.
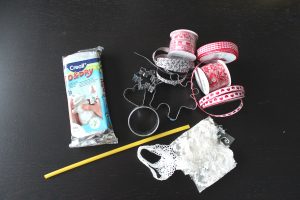 Material and tools:
- Air dry clay – you can buy this at almost any creative supply store
- Various cookie cutters
- Different pieces of lace – you don’t need a lot or big pieces or you can also use stamps
- Straws – they will be used to cut the holes out
- Ribbons
- Rolling pin
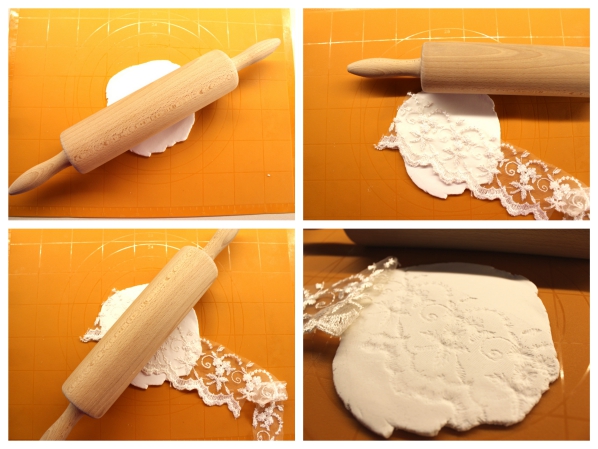
These steps are very simple and easy and will remind you of baking the Christmas cookies:
- Take piece of the air dry clay a roll it with the rolling pin until it’s approximately 5mm thick.
- Choose one of the prepared laces and place it on the rolled clay.
- Use the rolling pin to press the lace into the clay. Remove the lace carefully.
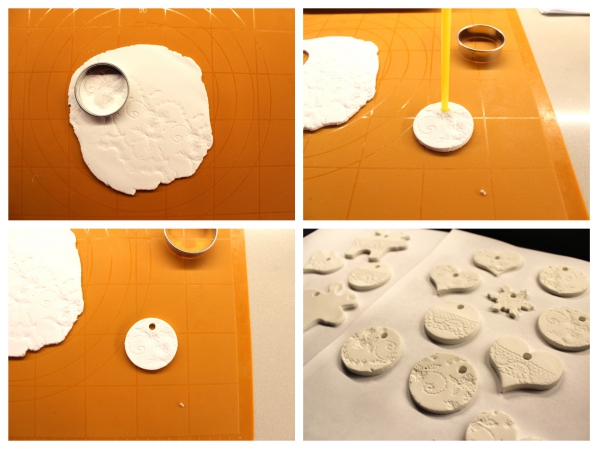
- Have a look at the pattern which was created in the clay, seek nice or an interesting part, take one of the cookie cutters and carefully cut it out.
- Use the straw to cut the hole.
- The ornament might have rough edges, to make them smoother, simply use small amount of water and smooth them with your finger.
- Place the ornament on a flat surface, now it has to dry. This will take at least one day, depending on temperature and conditions in your apartment.
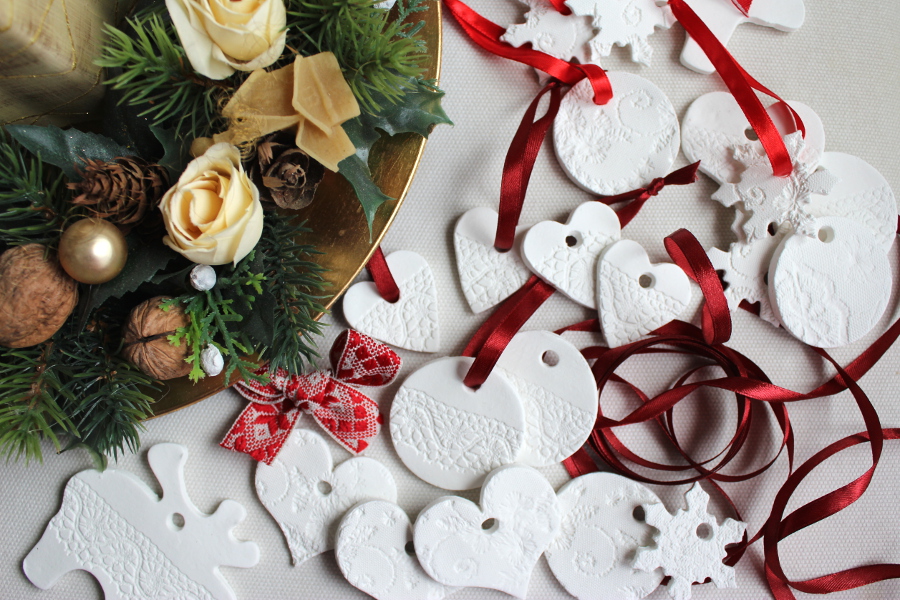
- Now you can repeat the process, get creative and make something nice 🙂
- After cutting few ornaments, take the scraps and use it again – You can roll the clay again and again.
- If the clay or edges are still rough after drying, use the sanding paper to smooth the areas.
- If you would like more colorful ornaments, you can use acrylic paint.
- After the ornaments dried, hang them on the ribbons and they are ready!
And that’s it!
We would like to wish you happy holidays and great start in the new year 🙂