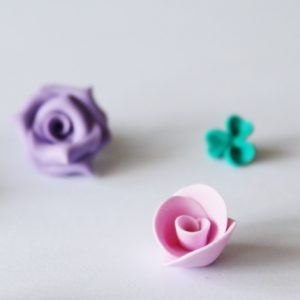
This easy polymer clay flower design is perfect for making polymer clay jewelry but I can easily imagine using it also on many other creations, you just need to use a bit of fantasy. These floral shapes might be also great for decorating a picture frame or bowl, bottle, literally anything. That is why we bring you this super useful free tutorial on how to shape this basic flower. So let’s get your supplies and start modelling, here is your tutorial:
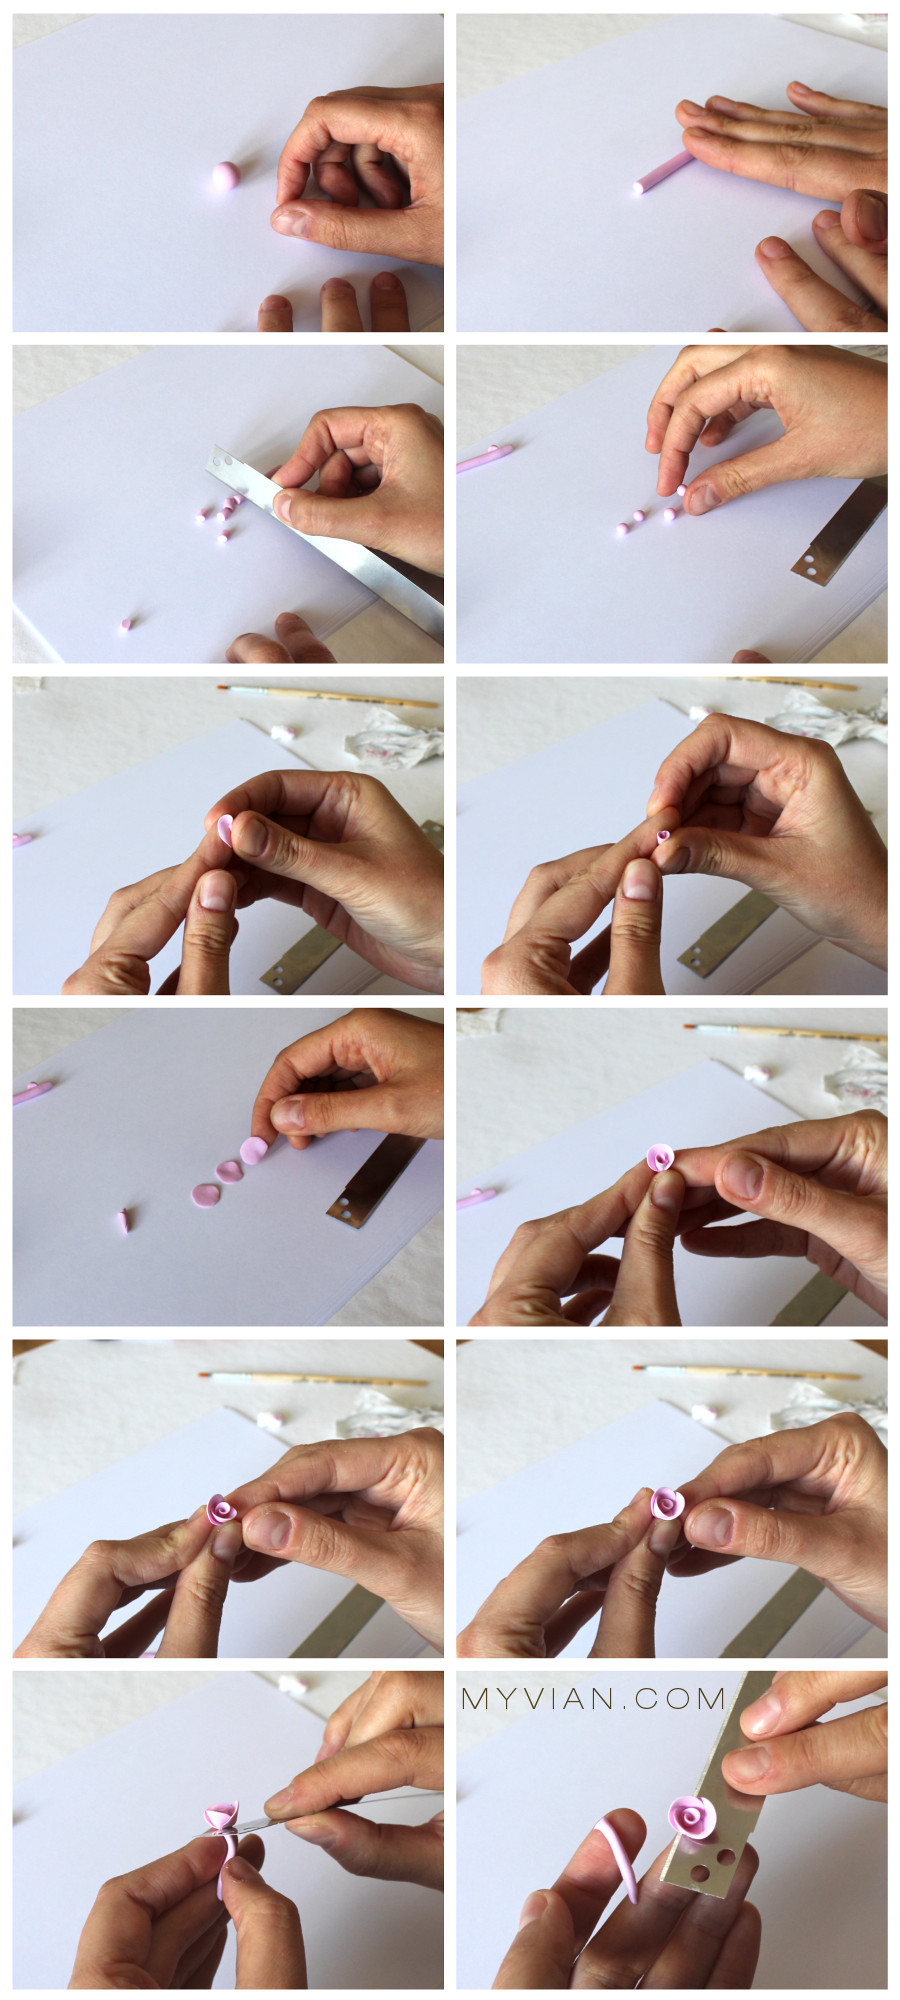
- Start with mixing the right color and conditioning the clay.
- Roll the clay with your hands into a nice even roll.
- Cut 4 pieces of approximately same size.
- Shape each piece with your fingers into a nice ball.
- Make one of the balls flat with your fingers and roll it into a roll, like in the picture.
- This will be the center of the flower.
- Make 3 more flat shapes.
- Place them one by one around the center of the flower.
- Try to place them evenly around.
- Now the hardest part is over 🙂
- Take the cutter and cut away the clay which you held with your fingers.
- Now you are done 🙂
 Do you have difficulties with this tutorial, or are you a complete polymer clay beginner? Check our online course – Learn To Make Polymer Clay Jewelry to get you started…
…or was this tutorial too easy for you and you would like to try something more challenging? Then check our ETSY shop for more advanced polymer clay tutorials 🙂
More tutorials for more kinds of these simple polymer clay flowers will follow soon.
Have a great day!

😍😘
❤❤